The second tutorial using scraps for appliqué makes use of those tiny little scraps that you’d otherwise throw away. At least I usually do, but I kept a few for these samples. Both these techniques can be used to make any shape you’d like.
The first sample uses scraps with fusible web on the back.
Draw your shape on a piece of parchment paper, deli paper or similar paper. Your scraps may have any shape or size, but for this tree shape, you can cut your scraps into small triangles. I used scraps from cutting out the dots on the iQuilt, giving my triangles a curved branch-like shape.
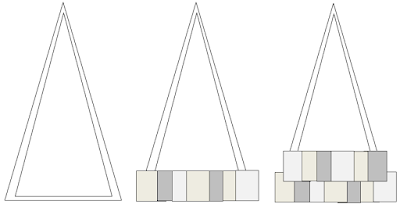
You will cover the tree with triangles, row by row. Start at the bottom, and place the triangles so that they are overlapping each other until the bottom row is covered.
Do the same for the next row
and all the other rows until the shape is totally covered.
Fuse the pieces together using a hot, dry iron and let it cool. You can either loosen the tree from the paper and use it as it is, or cut it out following the lines from the back and then remove the paper. Handle your tree with care. My tree has not been cut to shape as I rather liked the jagged silhouette.
The tree was fused onto a background and covered with silver tulle during quilting.
All the edges were free motion quilted, and the excess tulle was cut off using the tip of my scissors.
The second sample was made with scraps without fusible web on the back.
Draw your shape on a piece of fusible web and cut it out roughly. Your scraps may have any shape or size, but for this tree shape, cut your scraps into small rectangles.
You will cover the tree with rectangles, row by row. Start at the bottom of the tree, and place the rectangles so that they are overlapping each other until the bottom row is covered.
Do the same for the next row
and all the other rows until the shape is totally covered.
Fuse the pieces onto the fusible web using a hot, dry iron and let it cool.
Cut the tree out following the lines from the back. Carefully remove the paper from the back. The web will keep the pieces together when handled with care.
My tree was fused onto a background and all the edges were free motion quilted with dark grey thread.
The pieces will get a little rough around the edges. You can avoid this by covering it with tulle like for the sample above.
If you are wondering why on earth I’m posting a Christmas tree tutorial in February, you can see my answer on the previous post.)
Thanks for stopping by!


I'm enjoying your tutorials and they're giving me some ideas for other shapes....other holidays...like Easter eggs!
ReplyDelete