Wooosh. That’s the sound of August and September flying by. While I spent very little time in the studio, I was exercising every day, picking up the pace were I left off way too many months ago. We have been enjoying the most amazing weather this fall, so spending time outdoors has been a pleasure indeed.
I have returned to my studio though, happily working on this and that and stitching up improv blocks. I was planning to write a post about our brilliant day of Improv Round Robin back in September, but as I am having a bit of trouble uploading pictures today, they will have to wait to another day.
I have made progress on a few of the projects from this post, among others the block from the Design a block challenge.
The block was stashed away with a few bits and pieces which would go with it, but I had to play with a few other options first like this batik which I adore. It was way too busy, but you never know until you’ve tried.
Then this fabric caught my eye. It is a beautiful heavyweight woven cotton fabric which I picked up in Birmingham last year,
and with the purple embellishments, it was the perfect companion to the purple string from the bag.
A little slash and stitch later, and the top for a new pillow was finished. It has later been quilted, but those pictures need to be uploaded too. Oh well.
Thanks for stopping by!
The Bubble Quilt is a Purple book project (see this post).
I pieced it at the string quilting workshop back here.
It was supposed to become a modern pillow case, but instead I quilted the daylight out of it playing with bubbly free motion quilting designs.
Oh how much fun that was, so much better than endless straight line stitching.
It’s the perfect size for a table topper and the colours are just right for my living room.
(Sorry about the poor light)
One less page in the Purple book.
Thanks for stopping by!
When I first started out on the journey with my improv quilting study group, I was prepared for it to be challenging. While the first score was all fun, this one has been more challenging indeed, and also surprising. I was, for one, not expecting those strips of less-than-favourite fabrics to feel so precious when stitched together. Here they are on our last meeting where they were twisted and turned, admired and discussed. Would you believe that we spent three hours doing so and enjoying every minute of it?
I particularly liked how the blues and oranges bled into the middle set.
Adding some black and white; agreeing to add black to our tops.
I was also surprised how one quick idea would set itself in my mind. We had discussed, as suggested in the book, ideas for using our string sets at the last group meeting, and I had loosely drafted an idea. The sets were sitting in my studio for weeks before I got to them, and during that time that layout had cemented itself in my head. I will not say that it was not an improv process because I used the proper techniques and such, but I did not work as freely as expected.
Here are some of the thought processes which I went through on the way to a finished top:
Making that first cut – big step!
8 pieces – two oranges, two blues and four blue/oranges. I tried to cut them from different parts of the sets. The blue ones came out a bit small, so I inserted strips of the same strip set.
Adding more to the blue blocks.
Swapping the blue/oranges to make more of a square shape.
Auditioning strips. The middle bottom block done. The black makes the bright colours pop even more and draws the eyes towards the edges.
Back to rectangular shape; adding strips to the orange blocks and white filler fabric. The black strips were cut with scissors and turned out surprisingly straight. Wishing I had set the pieces a bit off when inserting the strips, but not so much that I wanted to redo them.
Slashing middle side blocks and stitching them back together just a little off to create movement and interest.
Stitching the right column together, realizing that the orange block got turned upside down and deciding to keep it. You have no idea how much time I spent considering how much white filler fabric to add between the blocks!
Creating a centre block, wanting it to be mostly white with lots of seams to create movement.
Adding more pieced fabric to the block.
Like it! Dreading stitching the three columns together impro style.
A finished top; stitching the columns together was not that bad and the top is quite flat too!
Love that centre block!
Working this way created quite a bit of filler fabric trash.
I am rather happy with the top considering all the white fabric (which I don’t use much, which is why I chose it for this quilt), and am looking forward to quilt it. I think it’s going to make a huge difference.
Thanks for stopping by!
One of the things I would like to learn is needle turn appliqué and planned to watch some videos on YouTube over the Easter break. As I said in this post, our WiFi was less than cooperative, so I started on a non-needle turn hand appliqué project instead which I finished today.
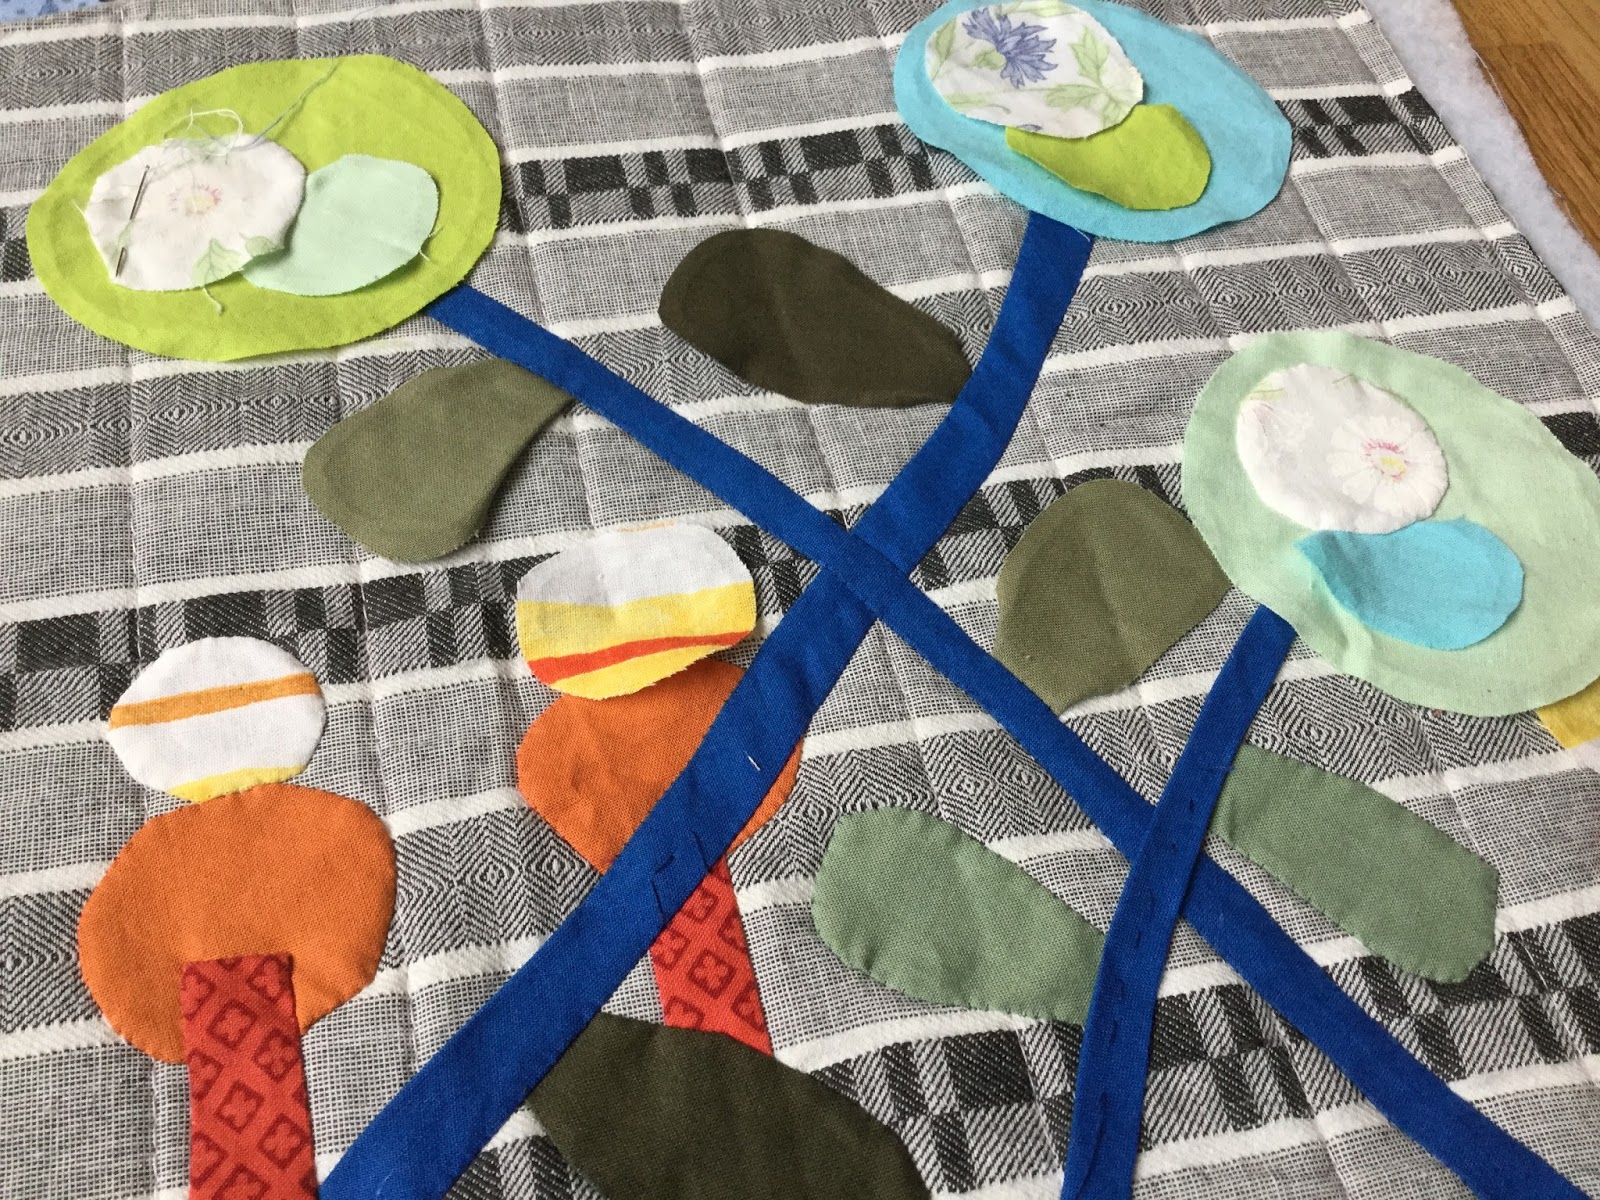
With only scissors and a regular paint stick at hand, I cut freeform pieces from some scraps, pre-creased the folds, and glued them onto a basted background. The background is a piece of a thrifted shirt with a lovely woven pattern.
I only had a few colours of thread, but practise is practise, so I stitched down one shape after the other, quite enjoying the rhythm and watching the shapes take form. Looking at it, I can tell that I got better at tightening the stitches and smoothing the curves as I worked my way through the pieces.
With so much hand work put into it, I wanted to hand quilt it, also something at which I would like to get better. I outlined the appliqué with heavy weight blue thread, and quilted lines on both sides of the basting stitches before removing them.
The quilt was bound with a flowery grey binding from The Big Box of Binding before diving into my button box.
It was rather difficult to restrain myself from adding too many buttons because they all looked great, but I was good, I stuck to the plan only embellishing the flower heads.
I am very happy with the result of my hand appliqué practise, particularly with the improv quality, and will most certainly give hand appliqué another go.
Every now and then I feel the need to take inventory of where I am and make a plan for where I’ll be going next. For quite a while now, I have been starting lots of new projects, trying different things. Last year, for instance, when I was feeling not so well, I pieced tops. Sometimes piecing seems less challenging than actually finishing quilts, doesn’t it? All that wrestling of huge chunks of fabric and batting and all can be physically exhausting – or maybe that’s just me.
And all those scraps I have been piecing together just to get my mojo back or to get rid of some of those ever growing piles of scraps? They can be made into anything. Anything!
My design wall back in January; these are now stashed away in a shoe box but will soon be made into something colourful and fun.
Anyway, finished tops and works in progress have been piling up all over my studio, and I feel ready to get back to them. Quite a few have been finished already and sent off to my magazine editor, which feels great, but there are still many more just waiting for their turn in the limelight.
(My design wall got full back in January, so I taped a piece of fleece to the wall. Three months later and it's still hanging there..)
I always like to think of my ongoing projects in a positive light; they are treasures on which I can enjoy working when I feel like it. I have kept a Treasure box for years, which I posted about here, and have made lots of projects from its content over the years. Well, my current treasures won’t fit into a box, so I keep them on a desk in my studio. To get an easy overview, I decided to keep a record. I found an unused diary from 2011 and have been writing down all my projects, one page for each project.
I write down ideas, plans, progress etc on each project, and when a project is ready to leave the studio (I stitch my bindings at home), I rip the page out and throw it away. That ripping sound is rather cathartic.
I’m not making promises which I not intend to keep, so I’ll not say that I won’t start any new projects until I have finished all of them, but working with my purple book has put forgotten treasures back in my mind. This is not a small task as things slip out of there way too soon as I move on to the next idea and the next and the next. Now I want to work on them, I get new ideas, and I have things ready to bring to guild meetings. No more throwing together a new project half an hour before the meeting starts; I’ll just take a look in my purple book to see what I would like to do today. Something small? Playing with blocks? Free motion quilting? Binding? Piecing? Well, I have got them all. Quilting large quilts is, by the way, the perfect task when I have company in my studio; chatting with someone makes time and miles of stitching fly.
How long I will keep my record – well that depends on how long it works for me. All I know is that for now, I’m gaining momentum.
How do you keep up with your projects? Do you work on only one project at the time, do you keep several at different stages, or are they ganging up on you and taking over your studio too?
Tonight is the third meeting of our little improv study group and we will be evaluating our string sets. Evaluating is an important step in the process; looking at what we learned, what we enjoyed, what we found challenging.
When evaluating the previous score, seeing the Floating squares side by side was quite interesting. We moved them around, observing how they changed hanging this way and that.
For the next score, Strings, we agreed on these restrictions:
One string set in colour 1, strings narrower than 2”
One string set in colour 2, strings from 2” and up
One string set with both colours, strings of all widths.
All three string sets to be width of fabric and larger than 12”.
I was the one who insisted on the 2” width as I am not a fan of piecing long, long narrow strips, and whatdoyouknow, that’s what I have been doing. My blue strings kept turning out 1“and less, I had to really focus not to do it.
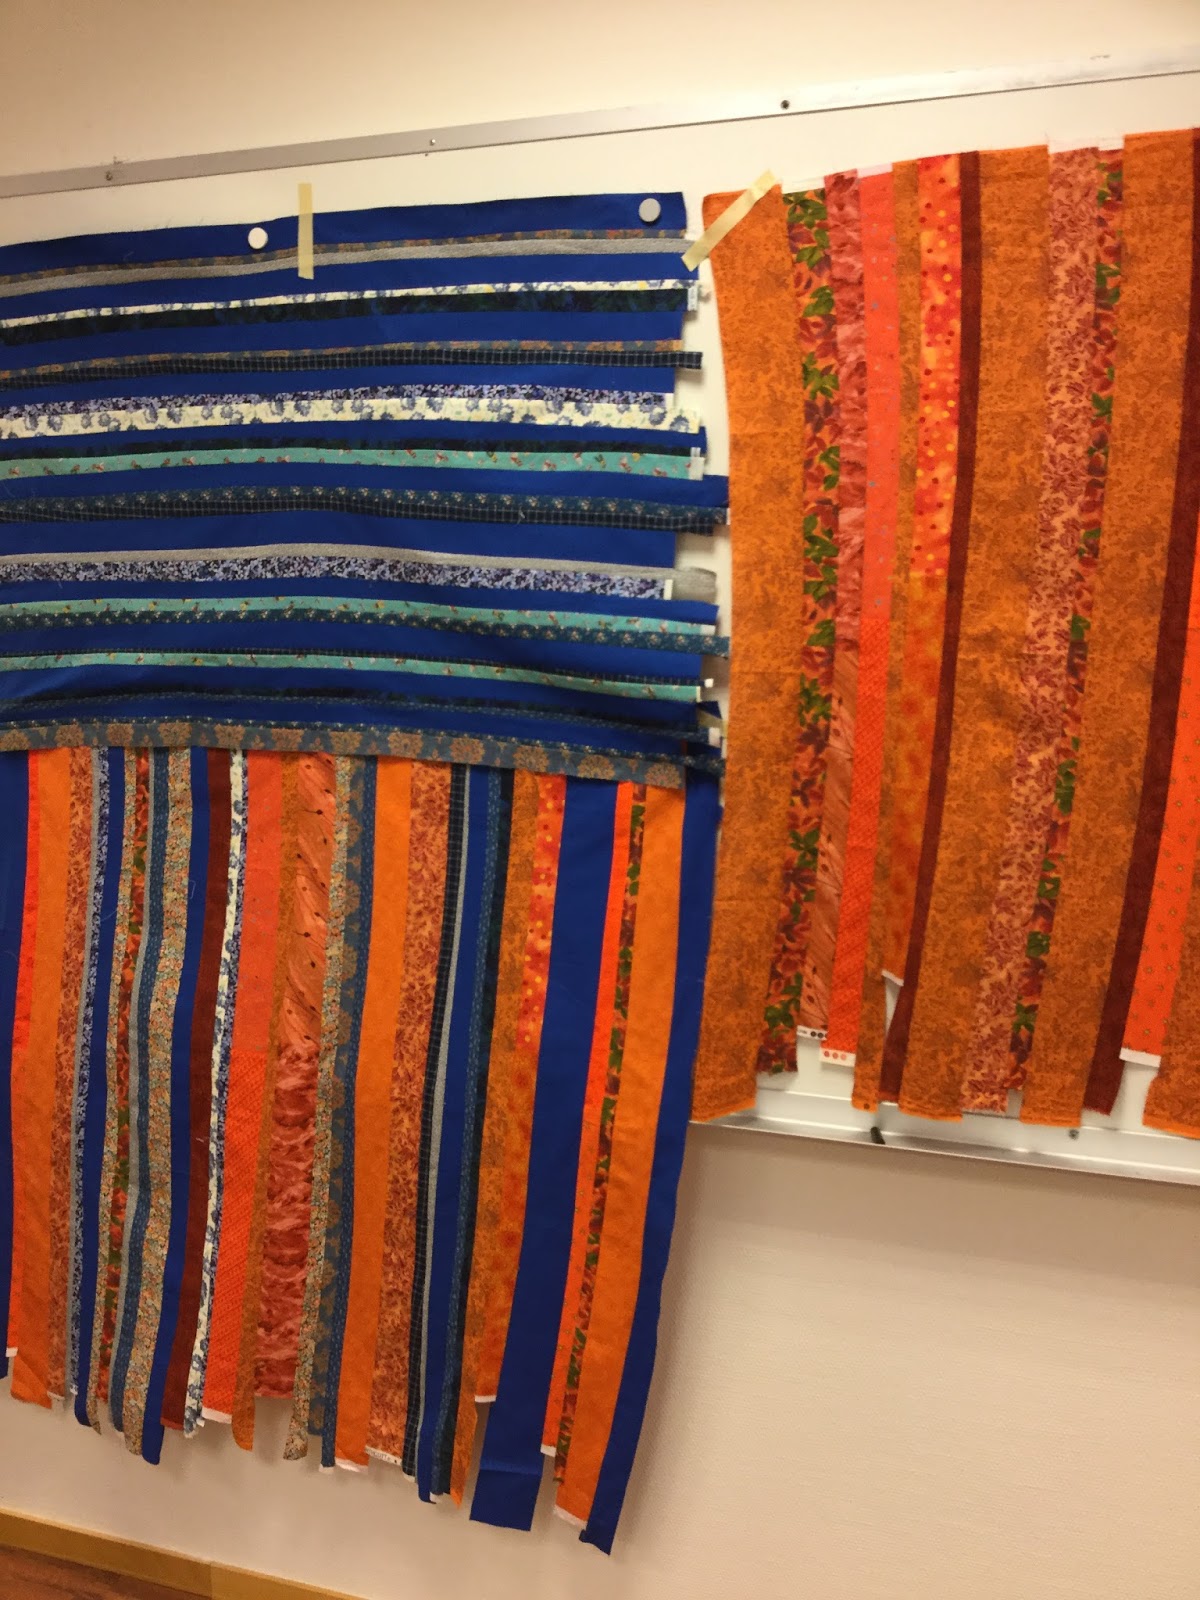
Piecing narrow strips together really takes a lot of time and concentration. After sewing all of them into pairs, I cut wider strips form a solid blue to alternate with the pieced strings. I am afraid I would never reach the 12” mark otherwise. It felt good moving on to the oranges.
As it turns out, my pieced string panels are way bigger than required 12”. The blue is 26”, the orange 29 1/2" and the orange/blue a whopping 43 ¾”.
Lots of oldies and not all goodies, but as a whole they look rather great I'd say.
Look at that tiny little light wedge, It's not even a 1/4", maybe 1/8" at the end.
I cannot wait to see where they will lead me; the first step will be started on tonight’s meeting.
Thanks for stopping by!
Hello there, I hope everyone enjoyed the holidays! We got back this morning from 5 days at our cabin with the boys, and it was lovely. Busy and lots of fun. I was planning to do some work and write some posts while I was up there, but the Wi-Fi was overloaded after a recent upgrade, and 3G isn’t really an option in our neck of the woods (literally), so Easter was basically offline at our place.
I had prepared some hand work before we left, and a little fabric play goes a long way. Lighting is an issue, so I brought the rechargeable Ottlite desktop lamp which I don’t need at home anymore; sitting at the back of the couch, it made all the difference.
Scraps from the yellow & orange scrap bin - I use too little yellow in my work and want to use it more in all its glorious tints and shades and hues and neighbours and cousins. This is one way to make friends with the colour yellow, simply use it - cut it, play with it, stitch it, enjoy it.
The “neutral” background – the sleeve of a recycled shirt, layered with batting and recycled backing, and basted by machine.
I had no plan really, but one night when the boys were put to bed, there was a cutting frenzy going on using my rather dull scissors. Many scraps were used as they were, others were cut into suitable sizes. Edges were often left untrimmed, giving some extra texture. Most fabrics are only used once, but wherever needed, I made second cuts to fill in small gaps.
When everything was in place, the pieces were tacked to the background with a regular glue stick. All good fun and done in a jiffy even though the result looks balanced enough I’d say.
While I had yellow thread i my sewing kit, I decided to stitch them down with hot pink thread. Just stitching basic running stitches through all the layers, one piece at the time.
The recycled base was ever so soft and easy to stitch through.
While I want to keep the colour mostly on the yellow side, I am planning to do fan quilting with blue thread. I think it will be wise to do some marking first, at least in the very beginning.
I haven’t been doing hand stitching for a long time, and it’s one of the things I’d like to do more; so handy to bring along and to put in some work when you have company.
Thanks for stopping by:)