Sunday, 29 November 2009

Playing with colours


You’ll need
- Regular wax crayons

- Ink and drawing tool, or fabric markers; I use ink and Fantastix from JukeboxQuilts

- A piece of freezer paper
- White fabric, washed and ironed
- Scrap of fabric for ironing
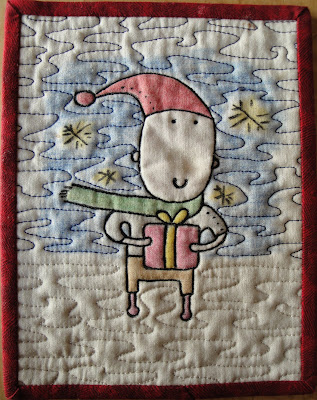
- A motif; any kind of appliqué or stitchery pattern, illustration or drawing would do fine. I have used a clip art Santa from Excel for this sample.

Using ink, you don’t have to stabilize the white fabric with freezer paper just yet. If you are using a hard tip fabric marker for drawing, you should iron freezer paper to the back.

Place your motif on top of a newspaper to protect your work surface.

Place the white fabric on top of the drawing; you should be able to see the lines through the fabric. If not, use a light box. I use a flashlight under a glass dish as my light box.

Draw all lines using ink or markers. If you’re using ink, dip just the tip of your Fantastix in the ink, and draw lightly. The unevenness of the lines is part of the charm using ink.
Let it dry, and fix the colour using a dry, hot iron.

Iron a piece of freezer paper to the back of the fabric, and start colouring the motif.

Fix the colours by placing a scrap of fabric on top of the motif and press using a dry, hot iron. The heat will melt the wax and set the colours into the fabric. The colours will get lighter, as some colour will come off on the fabric scrap.
You might have to add several layers of colour to get the result you want. Fix the colours between every layer.


Now you can make your motif into a small quilt, or make several blocks for a bigger piece.

I have free motion quilted the ink lines with black thread, the sky with a blue thread, and the snow with a silver metallic thread.

Playing with colours

If you enjoy playing with colours, you might want to try this technique. You can use it for blocks, small quilts, Christmas cards, or anything really. It’s fun, fast and easy, and suitable for kids too.

You can make this

using these

You’ll find a tutorial on the technique here.

Friday, 27 November 2009

Big & Tall

Download the image here.


Last ned illustrasjonen her.

Big & Tall

One more little finish this week; another UFO from my ever growing pile of UFOs which I didn’t even know was that big until I started looking for and collecting them from around the house.
A year ago I drew this little design and transferred it to a piece of fabric thinking I wanted some handwork. I might have been wrong, because after a year, it was still laying here basted to a batting recommended for stitchery. So; off came the batting, the little top was spray basted with a new firmer batting and backing, and off to the sewing machine.

When I do “stitchery” by machine, I sew every line 3 times, and so I did on this one too. Some pieces of binding from my Big Bag of Binding, some triangles on the back for hanging, and done!

If you have someone sweet and small in you life, feel free to make you own little “Big & Tall” piece, you can download the image from my Free pattern page.

Now I’m going to add this to amylou’s Thanksgiving sew & tell, and to Rosebud’s Fabric Friday.

Thursday, 26 November 2009

Panty bag

I have not done much this week quilting wise, as I have pretty much been a full time grandma due to some unexpexted and unwelcomed bumps in the road of life. So, as I get to spend some extra days with my favourite little guy, I have less time to spend in my sewing room working on Christmas presents or making my usual mess. Anyway – what I have finished is another UFO from last year’s Christmas season.


This is known as a “panty bag” – a bag for underwear or other stuff when travelling (or anytime else for that matter). I made lots of them last year, and this one for mother in law was left unfinished for some reason.

The top, made from scraps, was done, and all I had to do was baste (spray, very quick) and quilt it (walking foot and wavy lines in the speed of light), clean up the edges and sew it together. I make the panty bags very simple using ready made bias tape on the top, a button and button hole for closing, and a velvet ribbon for hanging. You’ll find a short description on how to make the bag in Norwegian and English here.

Wednesday, 25 November 2009

Lettvint Trusepose


Du kan laste ned en beskrivelse av hvordan du syr en enkel trusepose her.

Simple Panty Bag


You can download a description of how to make a bag here.

Tuesday, 24 November 2009

O Helga Natt (2000)

I have been scanning photos of some older work, and even though the quality is not exactly top notch, I want to share some of them. These pictures were from a long gone era when husband was used as a quilt hanger, and no, the quilt is actually square!O Helga Natt (Oh Holy Night) was a Christmas present for my parents in 2000, and they still just love it. They put it on their dining room table December 1. and it stays on pretty much all through Christmas. The rest of the year it’s neatly stored in a pillow case, only to be unpacked for show & tell once in a while.
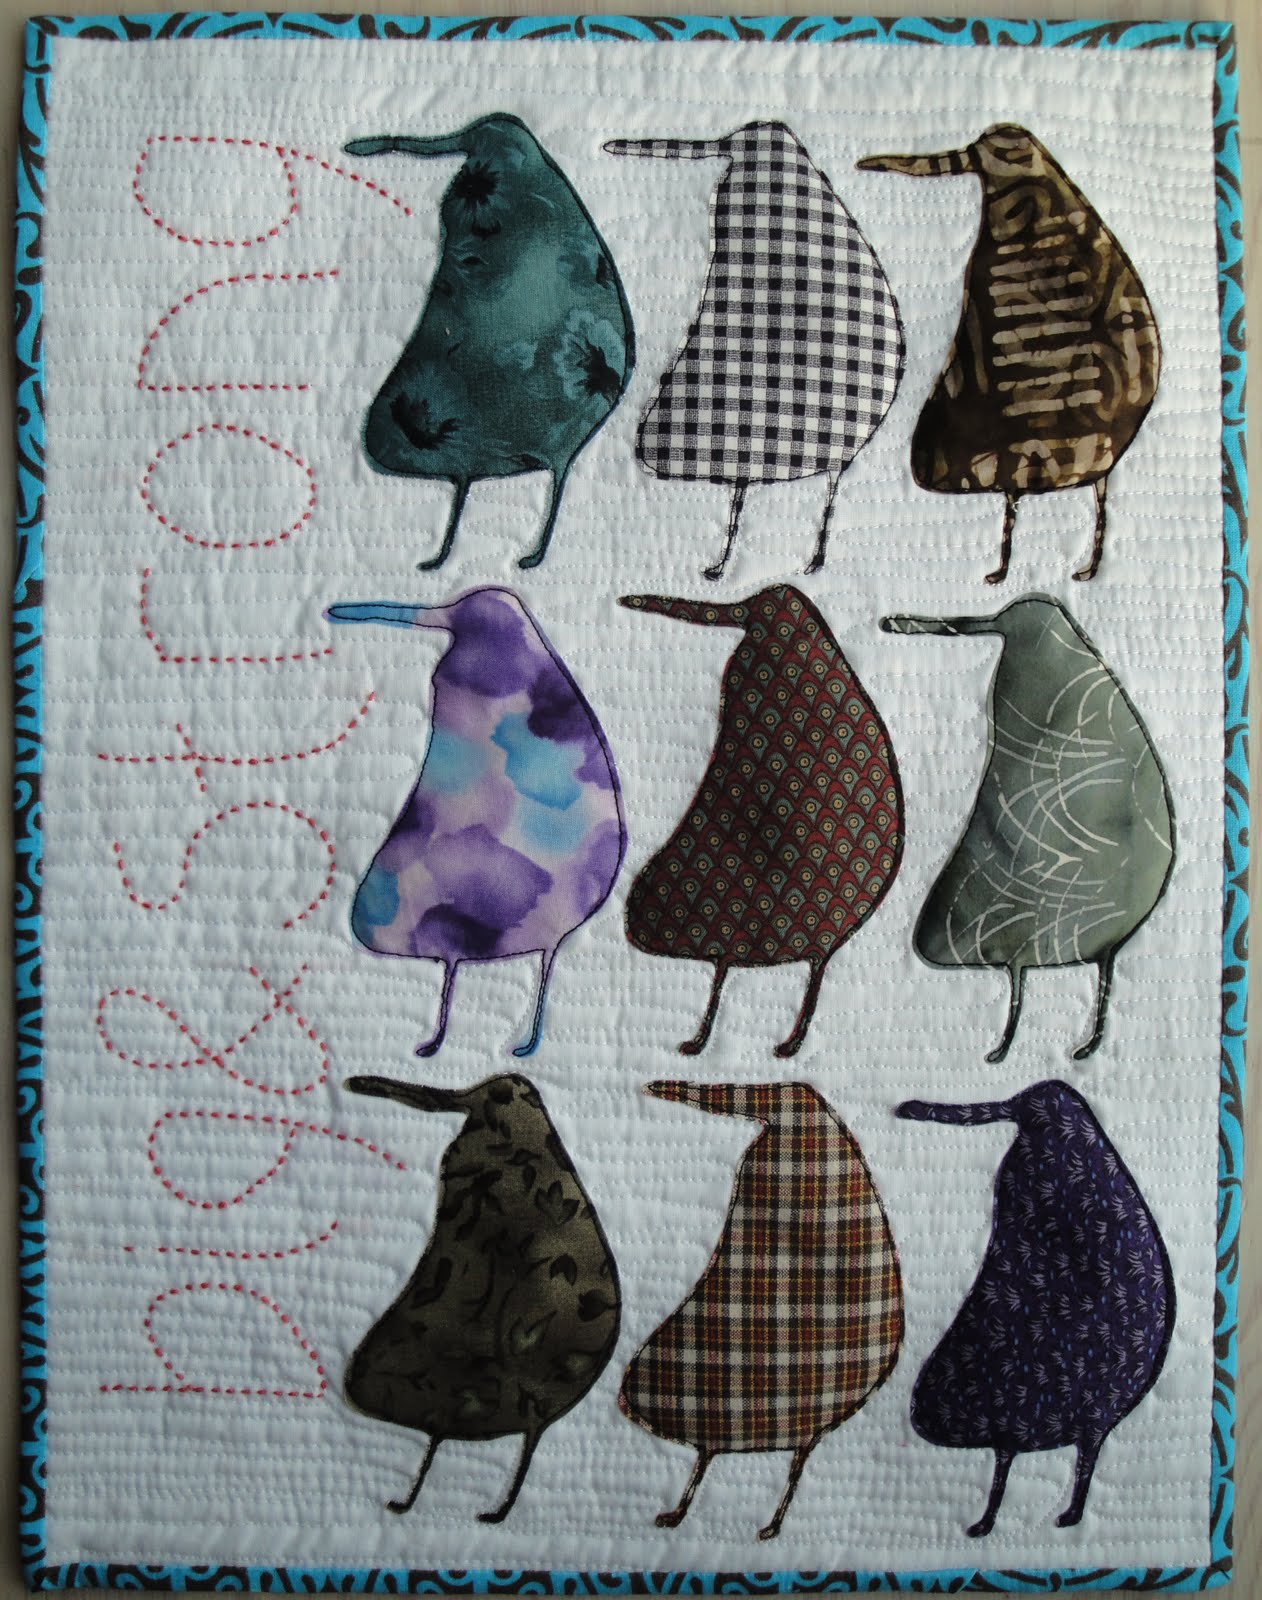
In 2000 I was still quite new at the whole quilting thing, but I drew the appliqué designs, pieced some stars and made it all into a medallion style table cloth. It measures ca 63”*63” and comes with a horrible polyester batting which was a challenge to quilt using an even more horrible invisible thread. It’s far from perfect, but they don’t care, and neither do I.


One day I’ll make a Christmas quilt for me which, if I’m lucky, I’ll love as much as my parents loves this one.

Sunday, 22 November 2009

The Big & Strong Quilt


Spending so much time and energy on the Big & strong program, I just had to make a Big and Strong quilt. I drew this little guy some time ago, and now the quilt is finished. It’s rather raw, with fusible appliqué just roughly quilted down around the edges. The background is free motion quilted, and the lettering added by hand with pearl cotton embroidery yarn.

Friday, 20 November 2009

Village No 1

The first village from my Finish It! project is finished. If you would like to build a village of your own, Christmassy or not, you’ll find my free pattern for this table runner both in Norwegian and English here. I am very pleased with how it turned out, but as daylight is rather scarce here this time of year and weather, I had to get a bit creative when photographing it.

Now I’ll pop over and add this to amylou’s sew & tell and Rosebud's Fabric Friday.

Thursday, 19 November 2009

Gorgeous Guinea Fowl

I have received my last fabric from The African Fabric Shop, from this order anyway, and I’m totally in love!

Guinea Fowl, Ghana Blue

Tuesday, 17 November 2009

Building A Village


You can download the pattern here.
If you have a problem downloading this pattern, please send me an email, and I'll email the pattern to you!

Å Bygge En Landsby


Du kan laste ned mønsteret her.
Hvis du har problemer med å laste ned mønsteret, send meg en email, så emailer jeg mønsteret til deg!

Building Site No 1

The third weekly update on my Finish It! project:

The first village is moving on from building site to an almost finished community. I found another filler fabric, black with white dots, which looks like snow. I come from a part of the country where Christmas is always white, so I can’t help myself:-)

The rows of houses are done, but I cut the heaven strip too short, so I’ll have to cut another one. Fortunately I have lots of this fabulous fabric. I have used only 22 of the 36 houses or the table runner would be way too long for any of our tables.

You'll find my house tutorial here.

Monday, 16 November 2009

Heavenly Angel

The latest issue of the Swedish quilting magazine Fat Quarter is out, and so is my Heavenly Angel.This was the last of my ideas for the Christmas workshop and patterns, but was a bit too different to go with the rest of them. It’s free motion embroidered and quilted by machine – super simple and done in an afternoon.

Friday, 13 November 2009

Pink Purse

The Wollen WIP is not a WIP anymore, but a finished Pink Purse for mom (mom, if you’re reading this, it’s too late, now you know what you’ll get for Christmas).

The woolly appliquéd layer was all done, and the lining finished, then put away. Mom did not love the lining fabric that much, so I got a plaid, Japanese one. Of course I cut it too narrow first, and had to cut another one, and the thing was too thick to get under the presser foot and had to be done by hand, but at last it was only missing the handles. I had bought a couple of bamboo handles, but had no idea how I would attach them without the seam showing on the outside. Finally I made 4 straps from the lining fabric, folded them around the handles, and attached them to the inside by hand.

Voila, another finished UFO, and I want a Pink Purse too:-) Now I’m going to add this to amylou’s sew a tell.

Thursday, 12 November 2009

African fabric

Here are my first genuine African fabrics from The African Fabric Shop; aren’t they fabulous?

The owner, Magie, kindly donated a prize for a quilting event my guild arranged a while ago, and I have been window shopping, well, not as much window as screen shopping as she’s located in the UK, up until a few weeks ago when I fell I love with these:

Two Huts, Blue

Guinea Fowl, Blue Steel

Pyramid, Blue Steel

Now they are laying in my living room waiting to be washed and added to my stash; I just have to look at them for a while...

Tuesday, 10 November 2009

Building a house


For a house that finishes at 4”*5” you’ll need a 4 ½”*5 ½” rectangle and two 2 ½”*2 ½” squares.
I have used thin, white muslin for the small squares, and done the sewing by eye to add a bit of whimsy. I you like your triangles straight, draw a diagonal line on the back side of the squares, and sew along the line.

Place the first square in one top corner of the rectangle. Sew a diagonal seam.
Flip the triangle and press the seam. I have kept all the three layers of fabric as I want the white triangles a bit fluffy (like snow). Cut the mid layer away if you like. If you mark and sew a perfect triangle, you can cut away both back layers if you prefer.
Place the second square in the other top corner. Sew a diagonal seam.
Flip the triangle and press the seam.
Turn the house block on the back, and cut away any excess fabric outside the rectangle.

Your house is done!
You'll find the free "Building A Village" table runner pattern using these houses here.

Building villages

Remember my new Finish it! project; all the 4 ½” strips of fabric? This week I have started making super simple house shapes from them. You’ll find a tutorial for making the houses here. I have made 36 houses so far, enough for a long table runner, and played a little bit with filler fabric. The cool thing with these shapes (in addition to being super easy to make) is that the white triangles will be a part of the background if you use the same fabric as filler, and snowy roofs if you use other fabric.

White fabric

Light blue with white swirly things (doesn’t it look like it’s snowing; well, it probably would if it was ironed...)
Dark grey with dots (doesn’t it look like it’s snowing at night?)
Black with gold swirly lines
Black and white stripes

I’ll have to make a lot of villages…